# 第六章 vue-router
# 相关理解
# vue-router的相关理解
vue 的一个插件库 ,专门用来实现 SPA 应用。
# 对 SPA 应用的理解
单页 Web 应用(single page web application ,SPA)。
整个应用只有一个完整的页面。
点击页面中的导航链接不会刷新页面 ,只会做页面的局部更新。
数据需要通过 ajax 请求获取
# 路由的理解
什么是路由
一个路由就是一组映射关系 (key - value)
key 为路径, value可能是 function或 component
路由分类
后端路由
1)理解:value是 function, 用于处理客户端提交的请求
2)工作过程 :服务器接收到一个请求时, 根据请求路径找到匹配的函数来处理请求, 返回响应数据。
前端路由
1)理解:value是component ,用于展示页面内容。
2) 工作过程 :当浏览器的路径改变时, 对应的组件就会显示。
# 基本路由
# 效果

# 总结
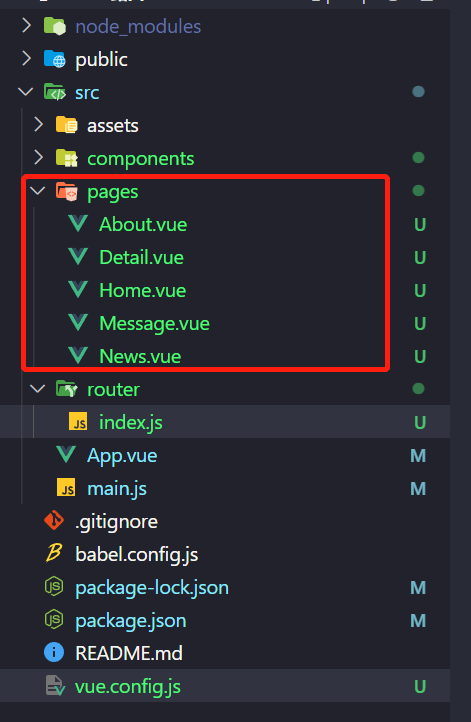
- 定义路由组件
- 注册路由
import About from '../pages/About'
import Home from '../pages/Home'
import News from '../pages/News'
import Message from '../pages/Message'
import Detail from '../pages/Detail'
2
3
4
5
- 使用路由
点击查看代码
// 该文件用于创建整个应用的路由器
import VueRouter from 'vue-router'
// 引入组件
import About from '../pages/About'
import Home from '../pages/Home'
import News from '../pages/News'
import Message from '../pages/Message'
import Detail from '../pages/Detail'

const router = new VueRouter({
  mode: 'history',
  routes: [
    {
      path: '/about',
      component: About,
      // 路由元信息
      meta: {
        title: '关于',
        isAuth: false
      }
    },
    {
      name: 'home',
      path: '/home',
      component: Home,
      meta: {
        title: '首页',
        isAuth: true
      },
      children: [
        {
          path: 'news',
          component: News,
          meta: {
            title: '新闻'
          },
          // 独享路由守卫
          beforeEnter: (to, from, next) => {
            console.log('beforeEnter', '独享路由守卫')
            if (localStorage.getItem('news')==='yes') {
              next() //放行
            } else {
              alert('没有权限!')
            }
          }
        },
        {
          path: 'message',
          component: Message,
          meta: {
            title: '消息'
          },
          children: [
            {
              name: 'detail',
              path: 'detail',
              // path: 'detail/:id/:title', //使用占位符声明接收params参数
              component: Detail,
              // 路由props配置
              //props的第一种写法:值为对象。该对象中的所有key-value都会以props的形式传给Detail组件。
              //props: { a:1, b:'helle' }

              //props的第二种写法:值为布尔值。若布尔值为真,就会把该路由组件收到的所有params参数以props的形式传给Detail组件
              //props: true

              //props的第二种写法:值为函数
              props({ query: { id, title} }) { //$route.query => { query: { id, title} } 解构赋值的连续写法
                return { id, title }
              },
              meta: {
                title: '详情'
              }
            }
          ]
        }
      ]
    }
  ]
})

// 全局前置路由守卫(初始化的时候被调用、每次路由切换之前被调用)
/*router.beforeEach((to, from, next)=> {
  console.log('beforeEach', '全局前置路由守卫')
  if (to.meta.isAuth) {
    if (to.name === 'home' && localStorage.getItem('home')==='yes') {
      next() //放行
    } else {
      alert('没有权限!')
    }
  } else {
    next() //放行
  }
})*/

// 全局后置路由守卫(初始化的时候被调用、每次路由切换之后被调用),没有next
router.afterEach((to, from)=> {
  console.log('afterEach', '全局后置路由守卫')
  document.title = to.meta.title || '凹凸信息'
})

export default router
2
3
4
5
6
7
8
9
10
11
12
13
14
15
16
17
18
19
20
21
22
23
24
25
26
27
28
29
30
31
32
33
34
35
36
37
38
39
40
41
42
43
44
45
46
47
48
49
50
51
52
53
54
55
56
57
58
59
60
61
62
63
64
65
66
67
68
69
70
71
72
73
74
75
76
77
78
79
80
81
82
83
84
85
86
87
88
89
90
91
92
93
94
95
96
97
98
99
100
101
# 嵌套(多级)路由
# 效果
# 代码
点击查看代码
import VueRouter from 'vue-router'
const router = new VueRouter({
    mode: 'history',
    routes: [
     {
      name: 'home',
      path: '/home',
      component: Home,
      meta: {
        title: '首页',
        isAuth: true
      },
      children: [
        {
          path: 'news',
          component: News,
          meta: {
            title: '新闻'
          },
          // 独享路由守卫
          beforeEnter: (to, from, next) => {
            console.log('beforeEnter', '独享路由守卫')
            if (localStorage.getItem('news')==='yes') {
              next() //放行
            } else {
              alert('没有权限!')
            }
          }
        },
        {
          path: 'message',
          component: Message,
          meta: {
            title: '消息'
          },
          children: [
            {
              name: 'detail',
              path: 'detail',
              // path: 'detail/:id/:title', //使用占位符声明接收params参数
              component: Detail,
              // 路由props配置
              //props的第一种写法:值为对象。该对象中的所有key-value都会以props的形式传给Detail组件。
              //props: { a:1, b:'helle' }

              //props的第二种写法:值为布尔值。若布尔值为真,就会把该路由组件收到的所有params参数以props的形式传给Detail组件
              //props: true

              //props的第二种写法:值为函数
              props({ query: { id, title} }) { //$route.query => { query: { id, title} } 解构赋值的连续写法
                return { id, title }
              },
              meta: {
                title: '详情'
              }
            }
          ]
        }
      ]
    }
  ]
})
2
3
4
5
6
7
8
9
10
11
12
13
14
15
16
17
18
19
20
21
22
23
24
25
26
27
28
29
30
31
32
33
34
35
36
37
38
39
40
41
42
43
44
45
46
47
48
49
50
51
52
53
54
55
56
57
58
59
60
61
62
# 路由传参
# params传参(显示参数)
params传参(在地址栏可见),分为声明式和编程式。
声明式
router-link
通过router-linek组件的to属性实现,该方法的参数可以是一个字符串路径或者一个描述地址的对象,该方式传值的时候,需要子路由提前配置好参数:
// 子路由配置
{
    path: '/news/:id',
    component: News
}
// 父路由组件
<router-link :to="/news/1050">新闻</router-link>
2
3
4
5
6
7
编程式
this.$router.push
该方式传值的时候同样需要子路由提前配置好参数:
// 子路由配置
{
    path: '/news/:id',
    component: News
}
// 父路由组件
this.$router.push({
    path: '/news/${id}'
})
2
3
4
5
6
7
8
9
在子路由中可以通过以下代码来获取参数的值:
// 注意:这里是this.$route 而不是this.$router
this.$route.params.id
2
# params传参(不显示参数)
params传参(不显示参数)也分为声明式和编程式,不同的是这里通过路由的别名name进行传值。
声明式
router-link
该方式也通过router-link组件的to属性实现。
<router-link :to="{name:'News',params: {id:'1050'}}">新闻</router-link>
编程式
this.$router.push
使用该方式传值的时候,同样需要子路由提前配置好参数,不过不能再使用:id来接收参数了,因为父路由中已经使用params来携带参数了。
// 子路由配置
{
    path: '/news',
    name: 'News',
    component: News
}
// 父路由组件
this.$router.push({
    name: 'News'
    params: { id: 1050 }
})
2
3
4
5
6
7
8
9
10
11
在子路由中可以通过以下代码来获取参数的值:
// 注意:这里是this.$route 而不是this.$router
this.$route.params.id
2
注意:上述这种利用 params 不显示 url 传参的方式会导致在刷新页面的时候,传递的值会丢失。
# query 传参(显示参数)
query 传参(显示参数)也可分为 声明式 和 编程式 两种方式。
声明式
router-link
该方式也是通过 router-link 组件的 to 属性实现,不过使用该方式传值的时候,需要子路由提前配置好路由别名(name 属性),例如:
// 子路由配置
{
    path: '/news',
    name: 'News',
    component: News
}
// 父路由组件
<router-link :to="{name:'News',query: {id:'1050'}}">新闻</router-link>
2
3
4
5
6
7
8
编程式
this.$router.push
使用该方式传值的时候,同样需要子路由提前配置好路由别名(name 属性),例如:
// 子路由配置
{
    path: '/news',
    name: 'News',
    component: News
}
// 父路由组件
this.$router.push({
    name: 'News'
    query: { id: 1050 }
})
2
3
4
5
6
7
8
9
10
11
在子路由中可以通过以下代码来获取参数的值:
// 注意:这里是this.$route 而不是this.$router
this.$route.query.id
2
# 编程式路由导航
相关API:
this.$router.push(path): 相当于点击路由链接(可以返回到当前路由界面)this.$router.replace(path): 用新路由替换当前路由(不可以返回到当前路由界面)this.$router.back()请求(返回)上一个记录路由this.$router.go(-1): 请求(返回)上一个记录路由this.$router.go(1): 请求下一个记录路由
← 第五章 Vuex